3D rendering is essential in creating realistic visuals for various industries, including architecture, interior design, product design, and entertainment. However, mistakes can occur during the rendering process, which can adversely affect the final outcome. In this blog post, we will discuss the top 3D rendering mistakes to avoid and how to overcome them to produce high-quality images.
Poor Lighting Setup
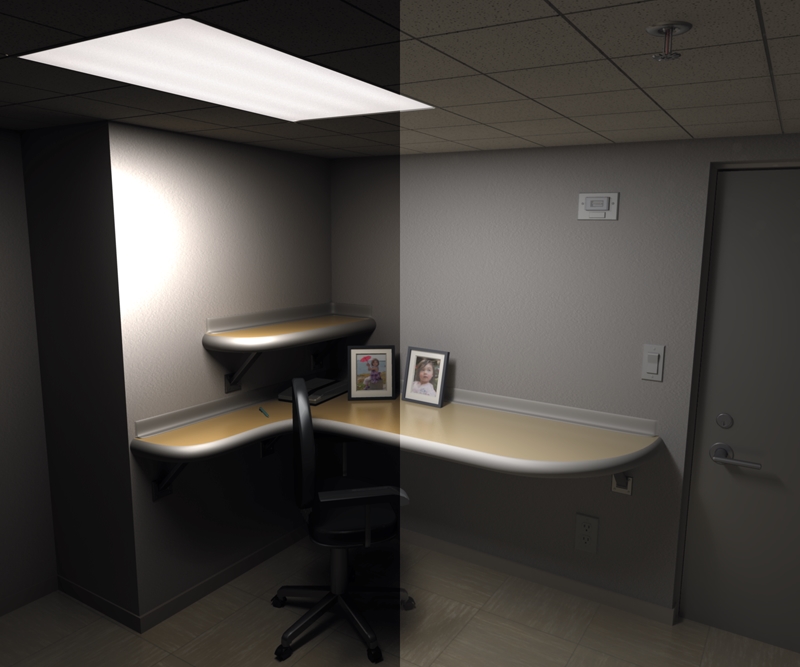
One of the most common mistakes in 3D rendering is poor lighting setup. Lighting plays a critical role in creating a realistic and visually appealing image. If the lighting is not set up correctly, the final render can appear flat, washed out, or overly dark.
How to avoid poor lighting setup:
- Understand the basics of lighting: Familiarize yourself with the fundamental concepts of lighting, such as the three-point lighting system and the different types of lights (e.g., spotlights, point lights, and area lights).
- Use HDRI (High Dynamic Range Imaging) maps: HDRI maps provide a wide range of light intensities, which can help create more realistic lighting conditions. These maps can be used as environment lights to simulate the natural lighting of a scene.
- Experiment with Global Illumination (GI): GI calculates the indirect light in a scene and can significantly improve the realism of your render. Try using different GI settings to find the perfect balance between render time and lighting quality.
2. Inaccurate Materials and Textures
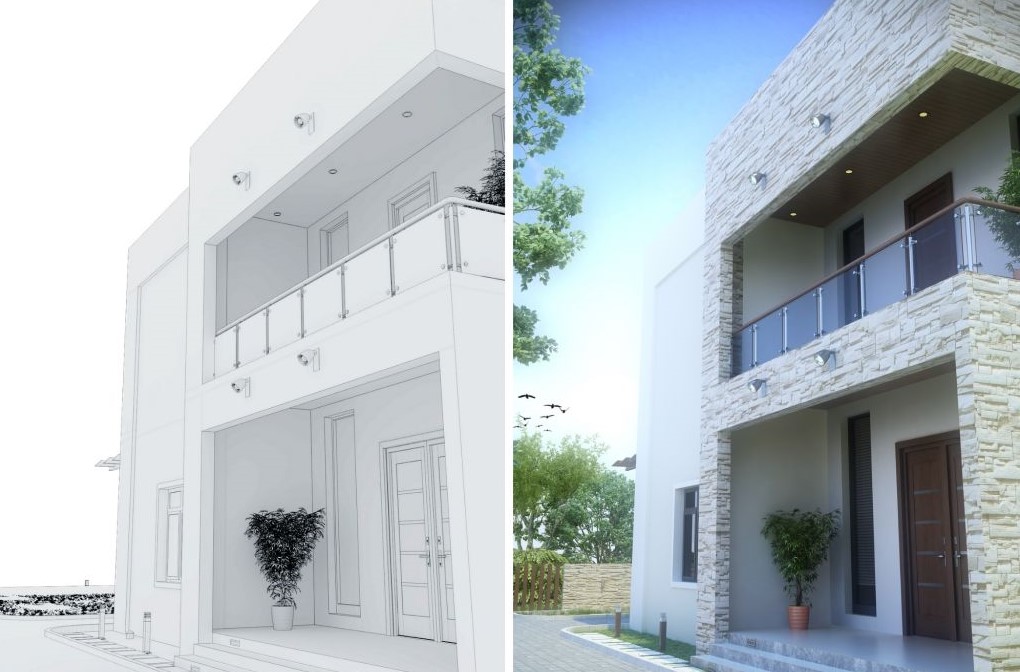
Another common mistake in 3D rendering is using inaccurate materials and textures. This can lead to unrealistic and unconvincing renders, as the materials and textures are what give an object its appearance and tactile qualities.
How to avoid inaccurate materials and textures:
- Use high-quality textures: Invest in high-resolution textures for your models, as low-quality textures can make your renders look pixelated or blurry. There are many online resources for free and paid textures, such as Texture Haven, Poliigon, and CGTextures.
- Use physically-based rendering (PBR) materials: PBR materials are designed to mimic the real-world properties of materials, such as their reflectivity, roughness, and transparency. By using PBR materials, you can achieve more realistic results in your renders.
- UV mapping: Proper UV mapping is essential for applying textures to your models correctly. Ensure that the UVs are laid out without stretching or distortion to prevent visible seams and texture misalignment in the final render.
Insufficient Detail and Modeling
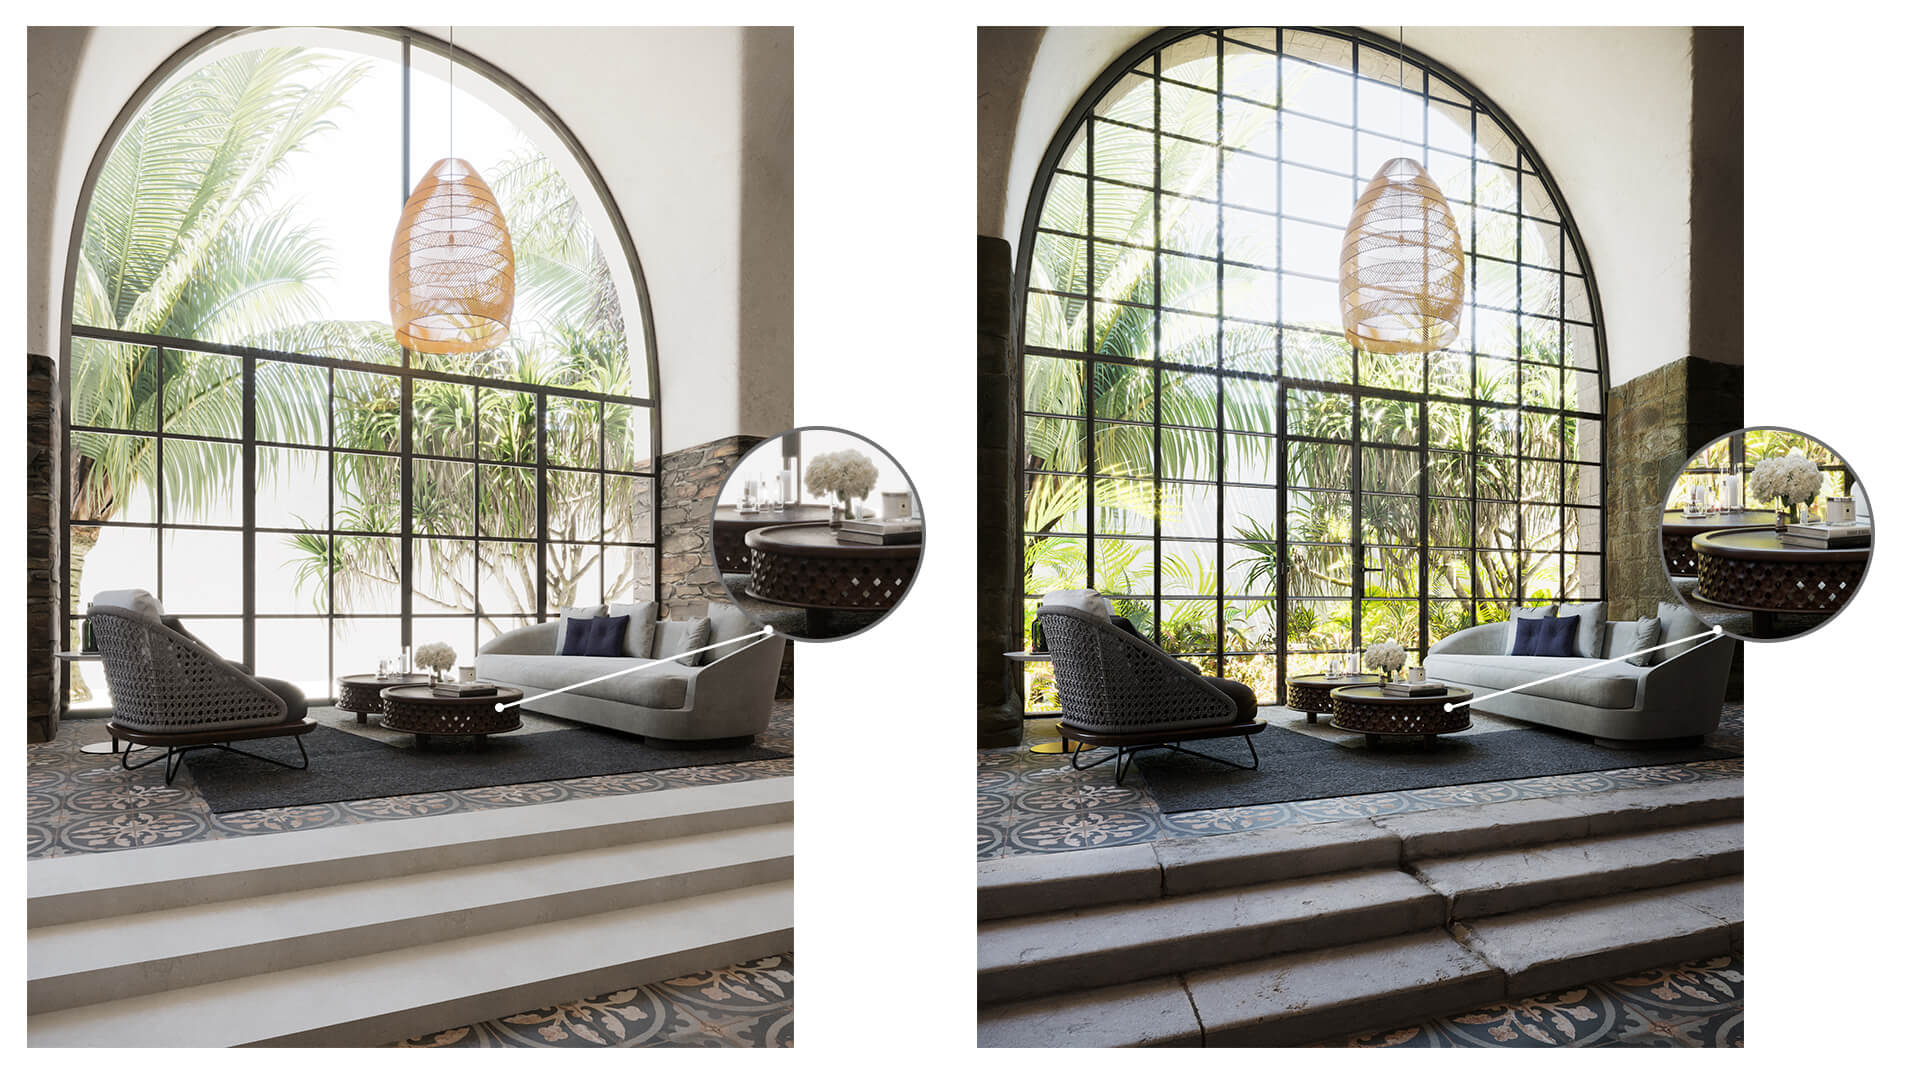
Another mistake that can lead to less-than-stellar 3D renders is insufficient detail in the models themselves. Poorly modeled objects can look unrealistic and detract from the overall quality of the final render.
How to avoid insufficient detail and modeling:
- Use reference images: When modeling an object, use reference images to ensure accuracy and realism. These images can help you understand the object’s proportions, details, and overall appearance.
- Focus on topology: Good topology is crucial for creating clean, efficient models that are easy to work with and render. Ensure that your models have a well-organized mesh with an appropriate level of detail.
- Add details using normal maps and displacement maps: Instead of modeling every small detail, use normal maps and displacement maps to add surface details to your models. These maps can create the illusion of depth and detail without increasing the model’s polygon count.
4. Ignoring Composition and Framing
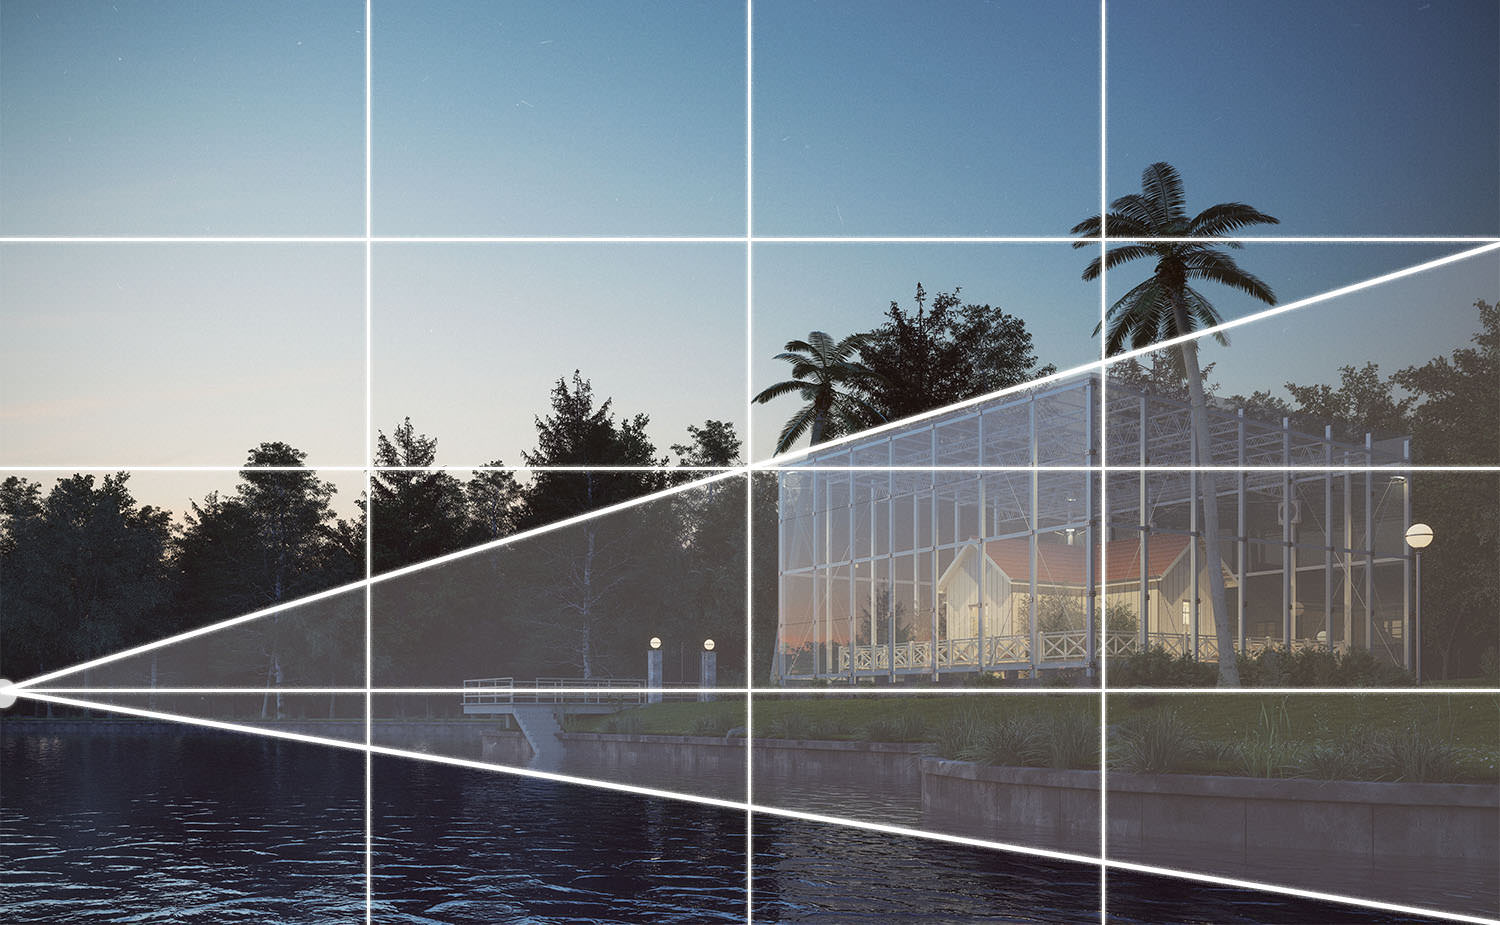
Composition and framing are essential aspects of creating visually appealing images. Ignoring these principles can result in unbalanced and uninteresting renders.
How to avoid poor composition and framing:
Follow the rule of thirds: The rule of thirds is a basic principle of photography and design that can help create balanced and interesting compositions. Divide your image into a 3×3 grid and place the main elements of your scene along the lines or at their intersections.
Use leading lines: Leading lines can guide the viewer’s eye through the image and create a sense of depth. Incorporate elements in your scene that lead the eye toward your focal point, such as roads, fences, or architectural elements.
Consider camera angle and perspective: The camera angle and perspective can significantly impact the final render. Experiment with different camera angles and focal lengths to find the most engaging and dynamic view of your scene.
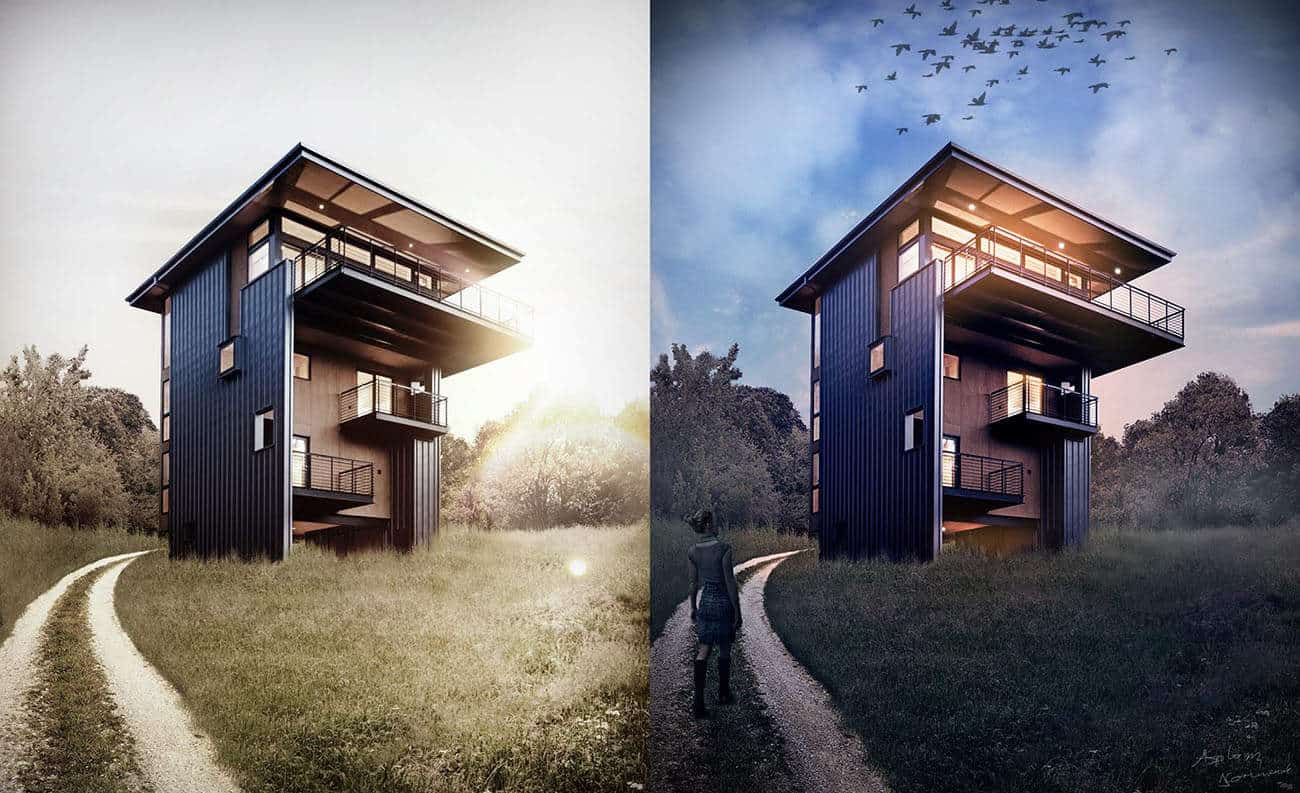
Overlooking Post-Processing
Post-processing is the final step in the 3D rendering process and can significantly enhance the quality and realism of your renders. Skipping post-processing, or not giving it the attention it deserves, can lead to lackluster results.
How to avoid overlooking post-processing:
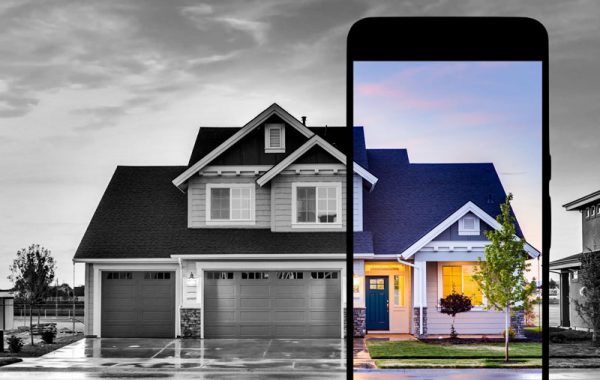
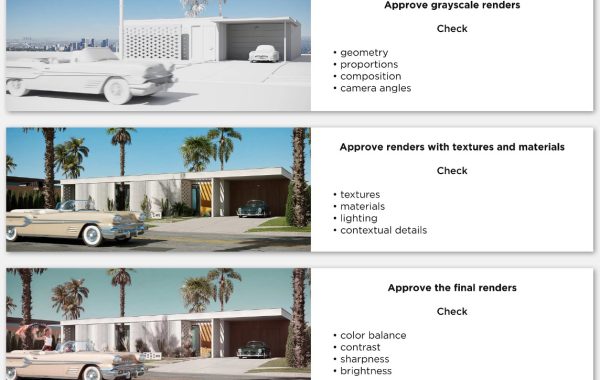
- Adjust levels and curves: Use levels and curves adjustments in your preferred image editing software to fine-tune the contrast and color balance of your final render. This can help create a more visually appealing and realistic image.
- Add depth of field and motion blur:Adding depth of field and motion blur can create a more cinematic and dynamic lookto your renders. Depth of field can draw attention to your focal point, while motion blur can convey a sense of movement and speed.
- Color grading: Color grading is the process of adjusting the colors and tones of your image to create a specific mood or atmosphere. Use color grading techniques to enhance the overall look and feel of your render, making it more visually appealing and engaging.
- Fix imperfections and add final touches: Post-processing is also an opportunity to fix any imperfections in your render, such as removing noise, fixing artifacts, or adding subtle touches like lens flares and vignettes.
By avoiding these common 3D rendering mistakes and applying the tips provided, you can significantly improve the quality and realism of your renders. Remember that practice makes perfect, and as you gain more experience, your skills will improve. Keep learning, experimenting, and refining your techniques to create stunning, lifelike images that captivate your audience.